


UNIT Test In Xcode For Your App
In General, we will test some parts separately before integrating into something if it’s working or not, otherwise, your full product will be wasted.
Of course not every developer wants to solve the bug after developed the whole App and don’t want to change business logic every time in app and compile the whole project and check results.
Stuck!!! THINK… what’s the solution to save our compile time, Then UNIT Test in the picture.
If you’re reading this iOS Unit Testing tutorial, you already know you should write tests for your code and UI, but you’re not sure how to test in Xcode.
Tests should run quickly, and the developer doesn’t mind by running them.
Let’s Start Testing.
Unit Testing in Xcode
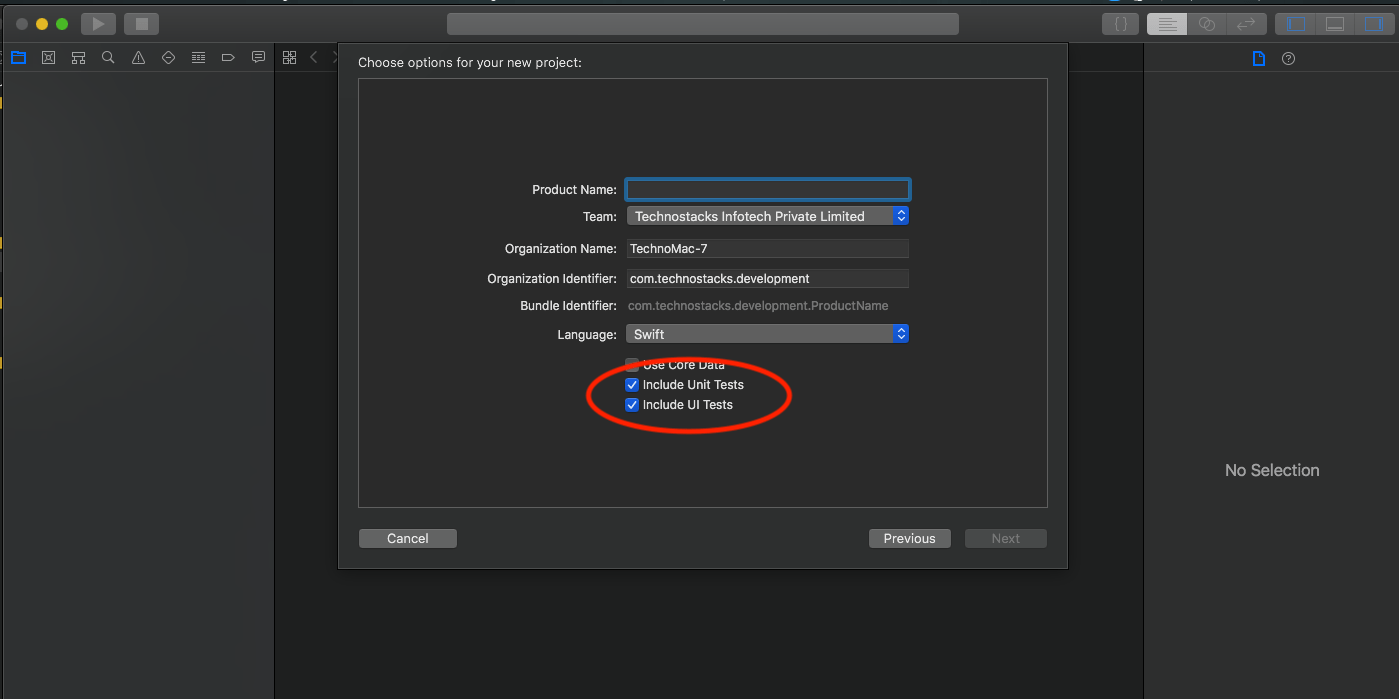
Create new Project File -> New -> Project. Enable both “Include Unit Tests” & “Include UI Tests” when Create you will have Tests files added in your source code.
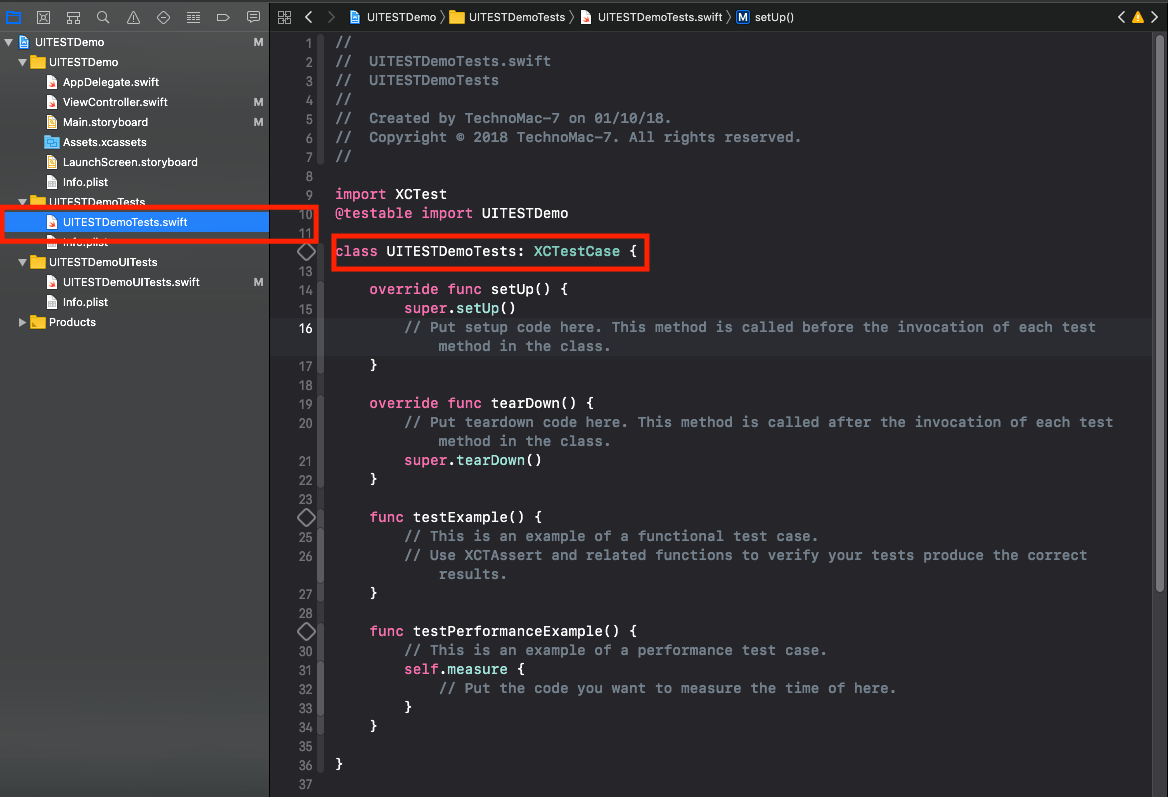
The template imports XCTest and defines a UITESTDemoTests subclass of XCTestCase, with setup(), tearDown() and example test methods. Also, it Inherit the XCTestCase class.
Related Article:- The Ultimate Guide For Scanning and Detecting 3D Objects With An iOS App
There are three ways to run the test class.
- Product\Test or Command-U. This actually runs all test classes.
- Click the arrow button in the test navigator
- Click the diamond button in the gutter.
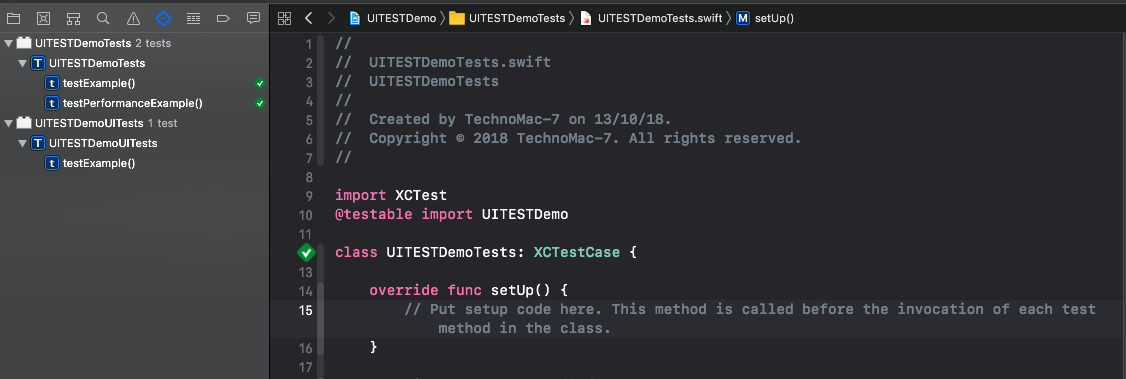
The sample tests don’t do anything yet, so they’ll run really fast!
When all the tests succeed, the diamonds will turn green and show check marks. Click the gray diamond at the end of testPerformanceExample() to open the Performance Result:
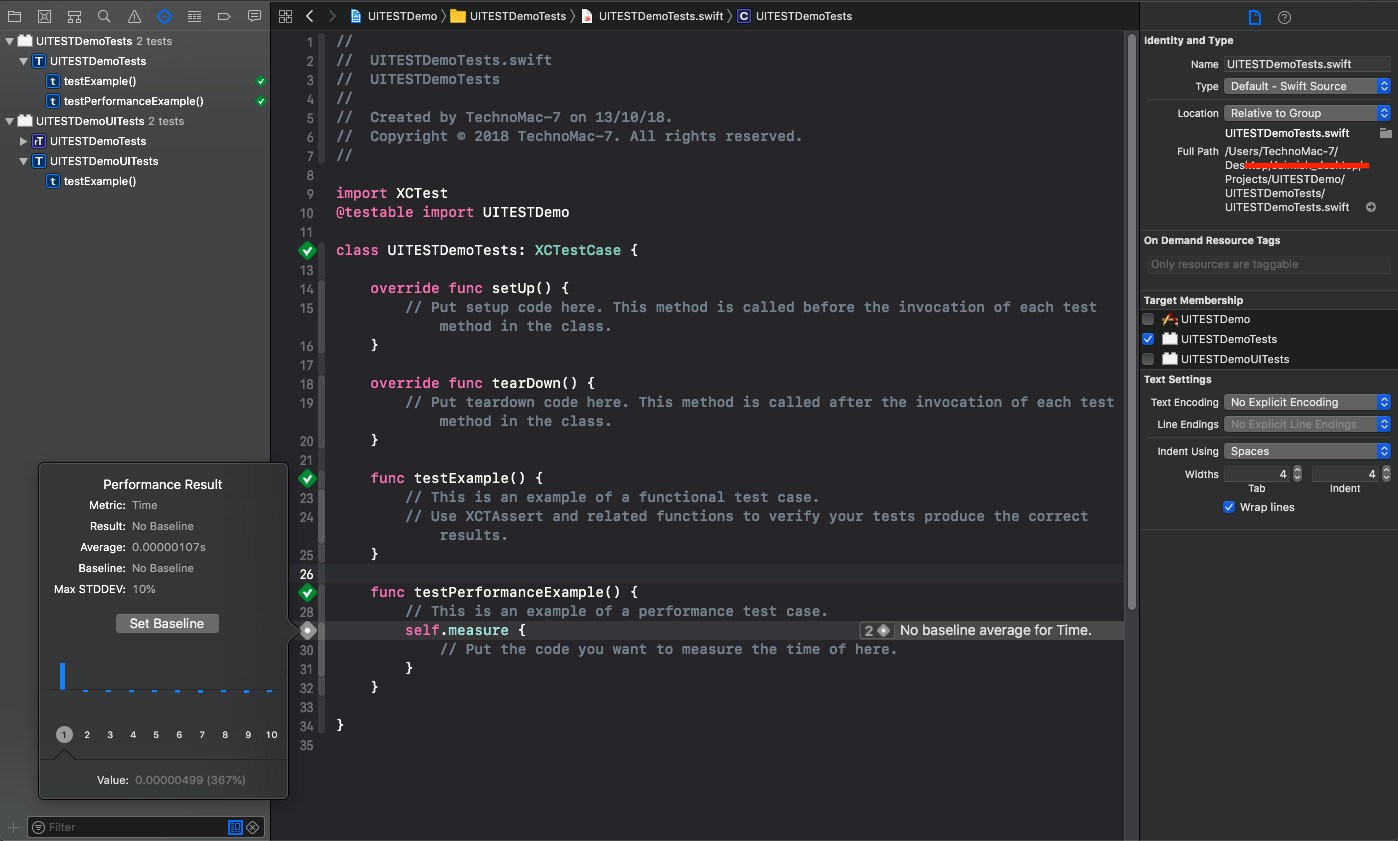
After the import statement there is “@testable import UITESTDemo”, this gives the unit tests access to the classes and methods in UITESTDemo.
For this blog, we just taking Google API and want to check if Google API working proper or not or any exceed Limit which says have to enter google key to access Lat long details from address.
Source:- maps.googleapis.com
Create API model which will make a network call and give response through closure block. API model code will look like below.
import UIKit
class APIModel: NSObject {

	override init() {

	}

	func jsonCallGET(classURL: String, completionHandler:@ escaping(_result:Any?,_error:Error?) -> Swift.Void)
	{
	    let urlString = classURL
		var request = URLRequest(url: URL(string: urlString)!)
		let session = URLSession.shared
		request.httpMethod = "GET"
		session.dataTask(with: request)
		{
			data, response, error in
			if error != nil
			{
				print(error!.localizedDescription)
				return
			}
			do
			{
			let jsonResult: NSDictionary? = try JSONSerialization.jsonObject(with: data!, options: JSONSerialization.ReadingOptions.mutableContainers) as? Any as! NSDictionary
			print("Synchronous\(String(describing: jsonResult))")

			if(jsonResult?.value(forKey: "status") as! String == "OVER_QUERY_LIMIT")
				{
					completionHandler(jsonResult?.object(forKey:"data"),error)
				}
				else
				{
					completionHandler(nil, error)
				}
			}
		catch
		{
		print(error.localizedDescription)
		}

		}.resume()
	}
}
Now at the top of the UITESTDemoTests class, add this property:
var APIModelObj : APIModel!
Create object APIModel in setup()
APIModelObj = APIModel()
This creates a SUT (System Under Test) object at the class level, so all the tests in this test class can access the SUT object’s properties and methods.
Before you forget, release your SUT object in tearDown()
APIModelObj = Nil
Now you’re ready to write your first test!
Replace you textExample() method with below.
func testcheckGETAPIcall() {
	// This is an example of a functional test case.
	let url = "http://maps.googleapis.com/maps/api/geocode/json/address=CGroad&sensor=true"
	APIModelObj.jsonCallGET(classURL: url) {
		(result, error) in
		XCTAssertNil(result, "API is not giving any response, please check with your backend developer")
	}

}
Run your test: it should stop at XCTAssertNil with a Test Failure.
Your XCTESTCASE runs successfully but it didn’t wait for the response which will get from the API, Now how can I validate API is working properly or not.
Solution
To test that asynchronous operations behave as expected, you create one or more expectations within your test and then fulfill those expectations when the asynchronous operation completes successfully. Your test method waits until all expectations are fulfilled or a specified timeout expires.
Create an expectation for a background download task in the top of your UITESTDemoTests class.
let expectation = XCTestExpectation(description: “”Check API call”)
Add fulfill statement in your response closer after checking the Assertion in testcheckGETAPIcall(). Fulfill the expectation to indicate that the background task has finished successfully.
Also, need to add Wait statement which will be waiting for the array of expectations created until it will be fulfilled, also we can specify a timeout in that so no response on a longer timer will automatically terminate the XCTEST with Failure.
Your function will look like as below :
func testcheckGETAPIcall() {
	// This is an example of a functional test case.
	let url = "http://maps.googleapis.com/maps/api/geocode/json?address=CGroad&sensor=true"
	APIModelObj.jsonCallGET(classURL: url) {
		(result, error) in

		XCTAssertNotNil(result, "API is not giving any response, please check with your backend developer")
		self.expectation.fulfill()
	}
	wait(for: [expectation], timeout: 60.0)
}
Run the test. If the API model will return nil it will stop on assertion statement.
That’s it. Stay tuned for UI Test with Xcode.